
How to get Started with Jira Automation Rules
- 5.15 Technologies
- May 4, 2023
- 4 min read
Would you like to get started with automation in Jira? Automation rules allow you to reduce the amount of repetitive, manual tasks and help to streamline Jira workflow processes. Just a few basic automation rules can make your project managers’ lives much easier and more convenient!
Common use cases for automation rules:
Set due date on a bug based on priority field value
Assign issues with certain issue type or field value to specific team members
Email the team if any issues go more than X days without an update
Automatically complete current sprint and start the next sprint on a schedule
…and much more!
Jira Software Docker Setup
If you don't have a test Jira environment with Automation for Jira installed already, we will use Docker to quickly get one up and running. We'll assume you have Docker Desktop installed and bash or an alternative shell to utilize the docker Command Line Interface. If you already have a Jira environment set up, you may skip these steps and proceed directly to creating a test project or installing the Automation for Jira plugin.
First, we should create a volume for our Jira home directory data.
docker volume create --name jiraVolume After that, we can pull and run the latest Jira Software image, passing the jiraVolume we created.
docker run -v jiraVolume:/var/atlassian/application-data/jira --name="jira" -d -p 8080:8080 atlassian/jira-softwareVerify your Jira Software container is running.
docker ps -a | grep atlassian/jira-software You should see output similar to this below, which will confirm that you ran the container successfully.
cfe08eaa7525 atlassian/jira-software "/tini -- /entrypoin…" 3 minutes ago Up 3 minutes 0.0.0.0:8080->8080/tcp jira Try navigating to http://localhost:8080 with your browser to access Jira running in your docker container. If you've set up the Docker container on a different workstation, you'll want to use that workstation’s IP in place of “localhost” in the URL above. You should see the Jira setup page.
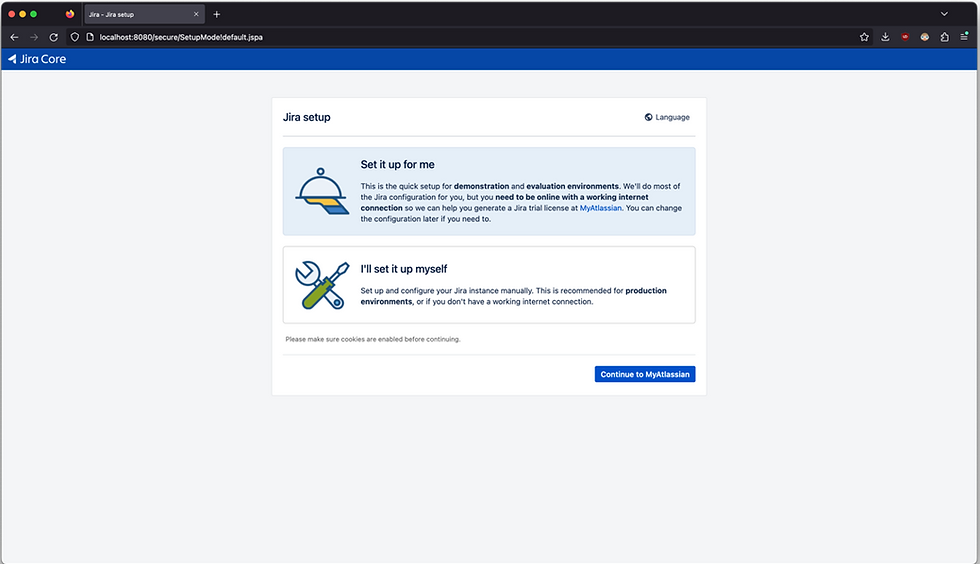
We’ll proceed with the default “Set it up for me” option selected. Click “Continue to MyAtlassian”.
Log in with your existing Atlassian ID, one of the supported third-party accounts, or create an account to continue.

Once logged in, you should be on the New Trial License page. Double-check the field values that were auto completed for you. Ensure Jira Software (Data Center) is selected as the License type. Then click “Generate License” when you are ready to proceed.

Click “Yes” on the Confirmation dialog to return to Jira running on your localhost.

Jira Software Initial Setup and Project Creation
You will be presented with the Administrator account setup page. Fill out the form to create your local administrator account. For our purposes, this does not need to use a real email address. But you may use one if you like. Click “Next” to proceed.

After a short wait for Jira to finish setting up, you will be presented with a screen saying, “Jira is ready to go!”. Click “Let’s get started” to proceed.

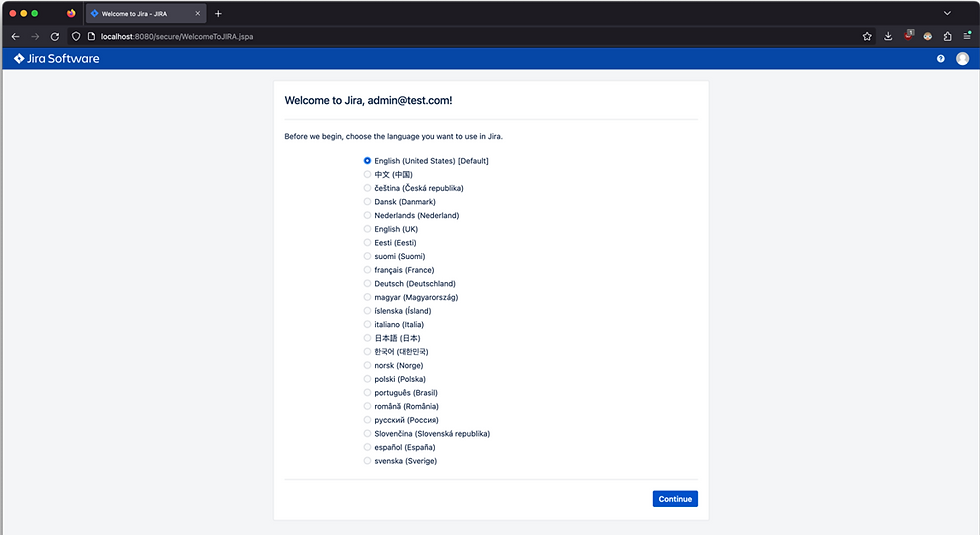
Select your preferred language or proceed with the default English (United States) by clicking “Continue”.
You may choose an Avatar if you like. Click “Next” to proceed.

Here we will be prompted to create our first Jira project. Click “Create new project” to begin.

Select a project type. We will use Scrum software development to have Jira automatically create a Scrum board for us. Click “Next” to proceed.

You will be presented with the default Scrum workflow and issue types. Click “Next” to proceed.

Enter a Name and Key for the project you would like to create. Click “Submit” to create the project.

You should be presented with the Backlog view for your newly created Scrum project.

Installing the Automation for Jira plugin
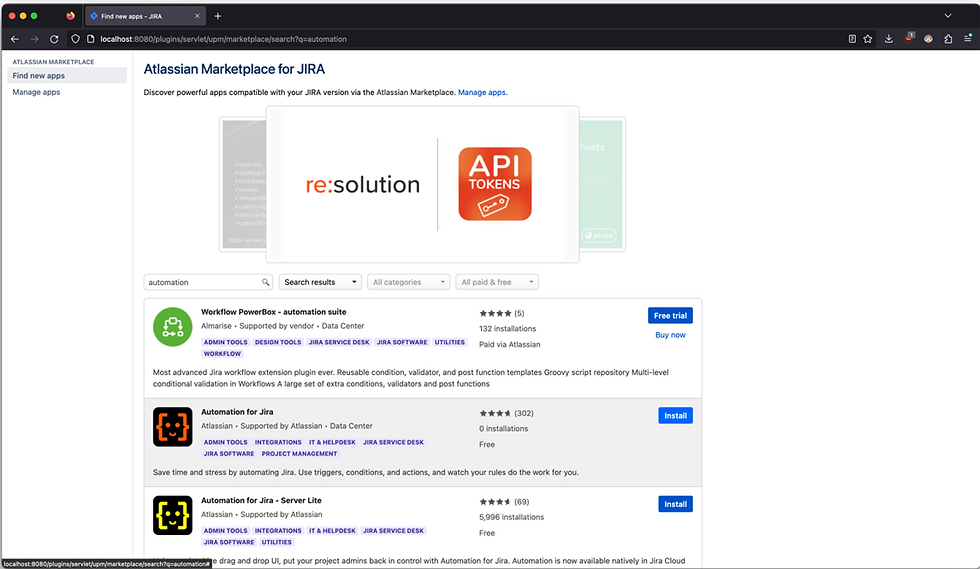
Click the Jira Administration settings cog to the top right of the main Jira navigation bar. Select “Manage apps” to proceed.

Enter “automation” in the search box and look for the Automation for Jira first party plugin supported by Atlassian. Click "Install" to proceed.
After a short time, you should see the dialog indicating Automation for Jira was installed successfully.

Creating Your First Automation Rule
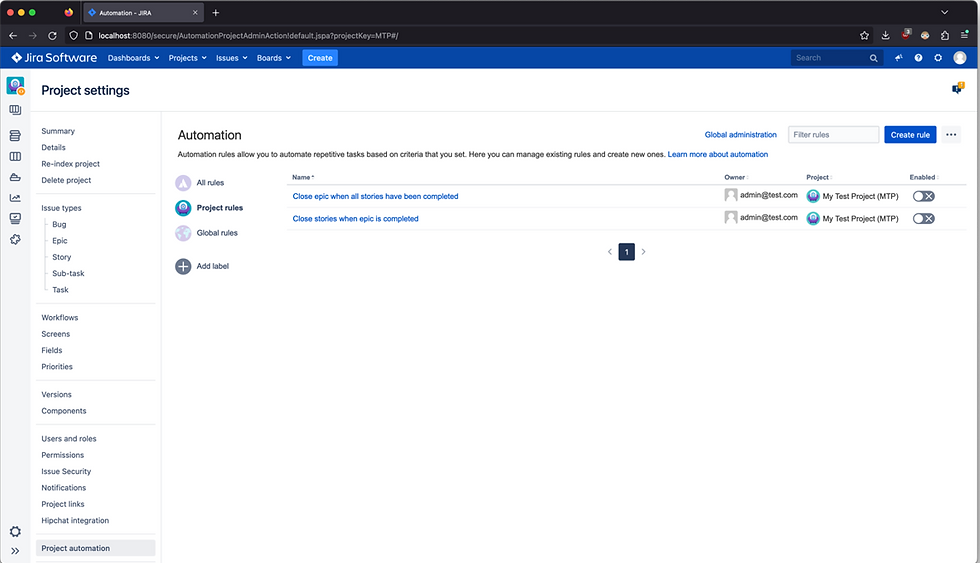
Navigate back to your test Scrum project and click the project settings cog at the bottom left of the project sidebar.

Scroll down slightly and click the “Project automation” entry under Project settings.

This is your hub for creating automation rules for your Jira projects. I recommend clicking the link “View automation guide” to get an idea of the kinds of automation triggers and events you can use when building automation rules.

When you are ready to proceed, click the “Add template rules” button to generate a couple example automation rules.
Click on the name of a rule to view the rule details. This should give you a basic idea of what useful tasks can be automated. You can see the steps the rule will follow in a very simple and easily readable format, as well as a link to view the Audit log.
The Audit log is a very useful section for viewing logged events related to a rule. For example, who edited a rule and what they changed, when the rule last executed, and whether the results of previous executions were successful or had any errors. If you need to troubleshoot a rule not executing properly, the Audit log is the first place you should look!
This simple rule will automatically close an Epic when all linked Stories have been completed. Remember that the automation rule still must be enabled before it will begin running. Click the greyed-out switch at the top right of the page to enable it!
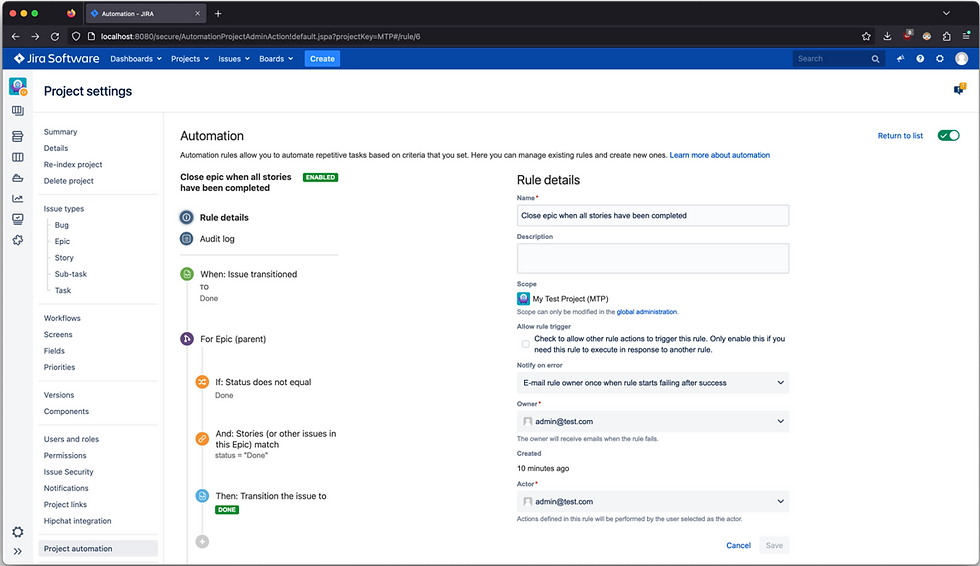
You can now see the rule is enabled. You can click the link “Return to list” to return to the list of automation rules.

Now if you’d like, you can test the rule we have enabled. Try creating an Epic, assigning it a few issues, transitioning the linked issues to done. You will see the Epic now automatically closes itself due to the rule we enabled.
Conclusion
As you can see, it is not so hard to install and get started configuring Jira automation rules. The capabilities of automation rules are limited only by your own imagination. Check out some additional reading to get some ideas!
Additional Resources:
Thank you for taking the time to review this article and feel free to contact us if your project needs more advanced capabilities.


Comments